
# Trim the video
Enter https://timemachine.byteark.com (opens new window) and login with your ByteArk Account. The system automatically selects the channel for you. You will find the interface:
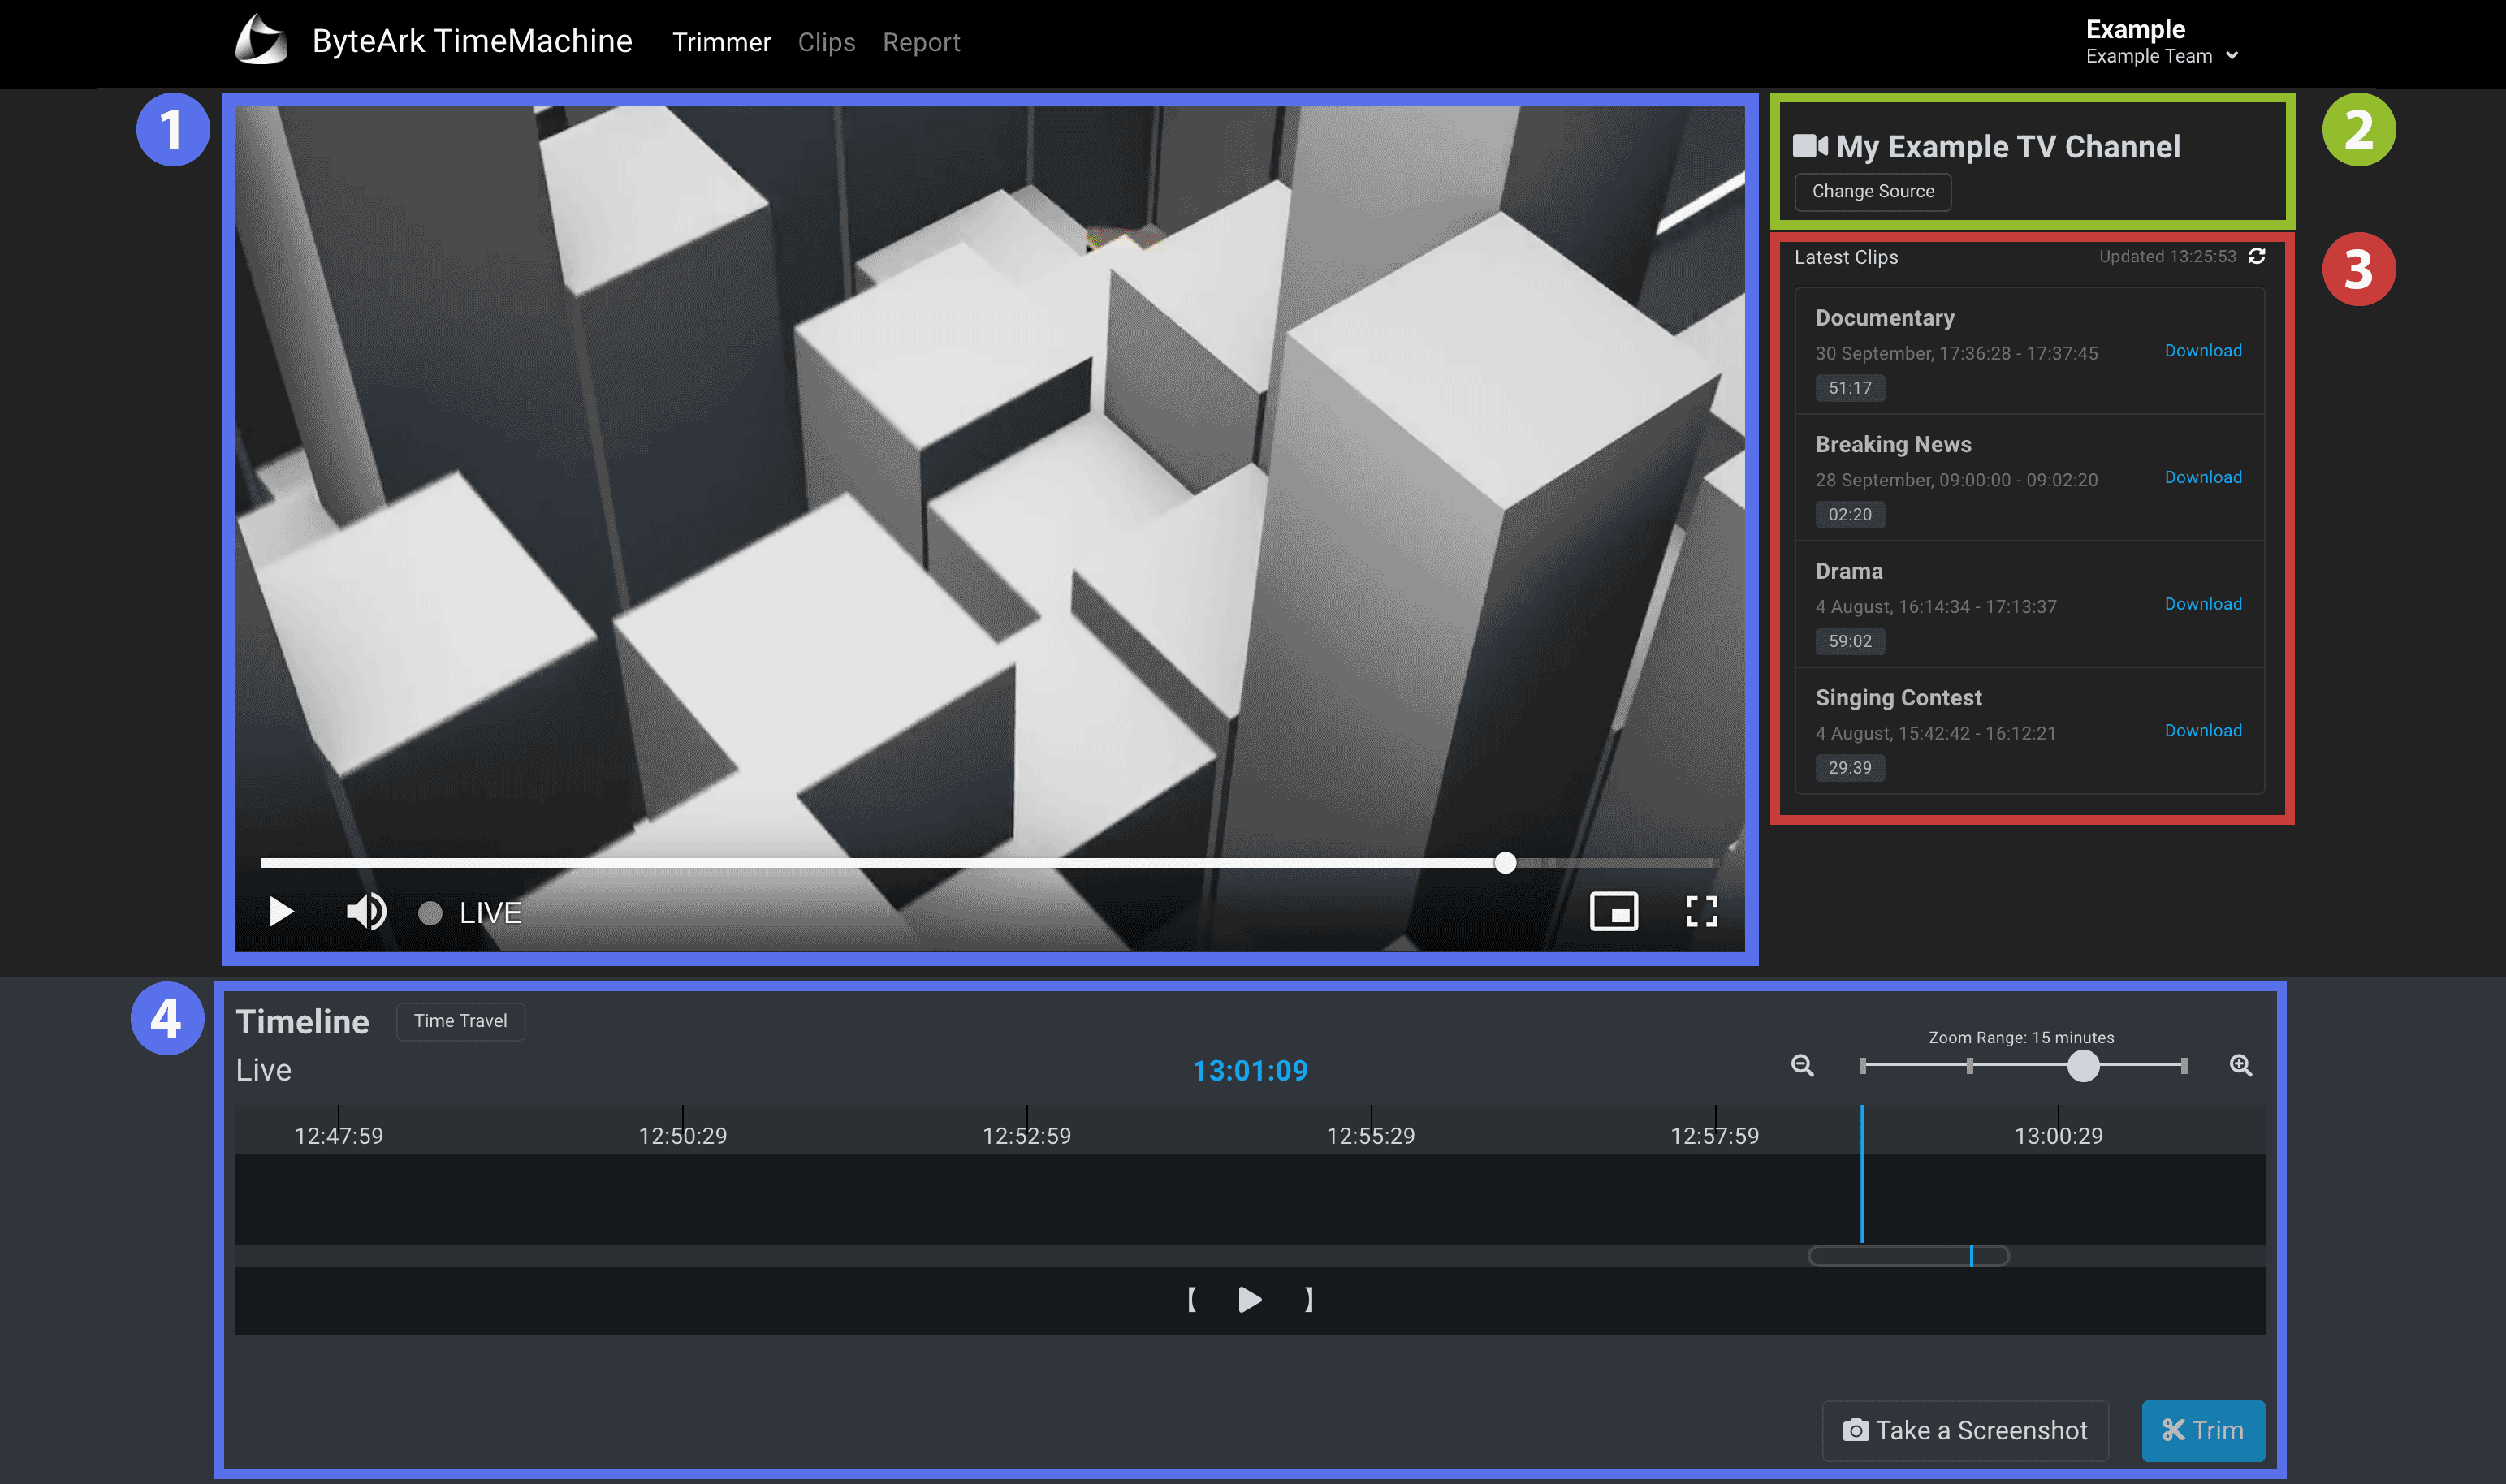
This screen can be distinguished into 4 sections:
| # | Name | Description |
|---|---|---|
| 1 | Player | For preview the video at the current position |
| 2 | Channels | For changing a channel |
| 3 | Latest Clips | For listing latest trimmed clips |
| 4 | Timeline | For trimming the video, will be explained below |
# Get to Know Timeline
Timeline is the trimming area.
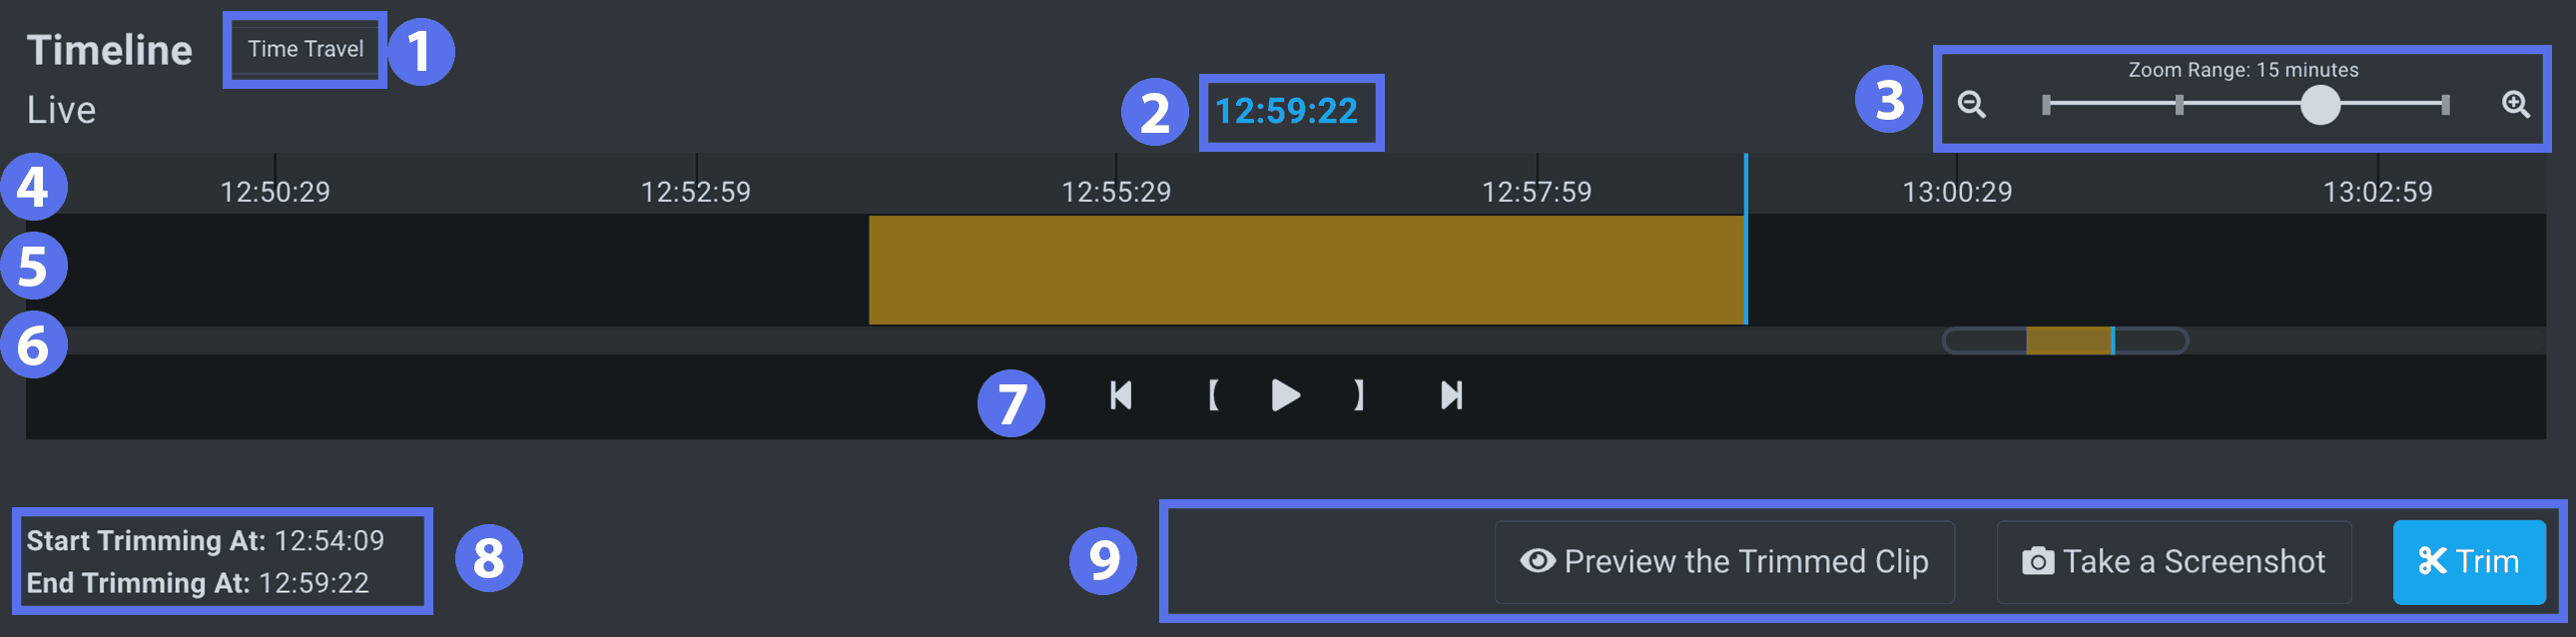
| # | ชื่อ | คำอธิบาย |
|---|---|---|
| 1 | Time Travel | Choose the previous time in case the timeline is out of range. The system uses the current time (Live) by default. |
| 2 | Current Timestamp | Displays current timestamp of the vertical blue line, which is the same as the preview screen. |
| 3 | Zoom Bar | Zoom in or zoom out the timeline. The system uses 15 minutes time range by default. |
| 4 | Indicator | Show timestamp of its line. |
| 5 | Trimming Area | You can click to select the time here, you can also hold the left click and drag to the right to select the time. The vertical blue line is the current time. The yellow bar is the selected time to be trimmed. |
| 6 | Navigation Bar | You can move the timeline here. There is also an indicator showing where the current time and the selected time is. |
| 7 | Toolbar | Including the following tools: Seek to the start time ( Visible when the time range is selected ) Mark the blue line as a start time Play or Pause the video at the vertical blue line Mark the blue line as an end time Seek to the end time ( Visible when the time range is selected ) |
| 8 | Status Bar | Displays timestamps of start trimming and end trimming. |
| 9 | Action Bar | Including the preview button, screenshot button, and trim button. |
TIP
You can also press the left / right button on your keyboard to seek through the timeline.
# Start trimming
- If your desired time is not on the Timeline, please press the Time Travel button and choose the date and time.
- Click on the trimming area to preview the video, find the start, then click the button to set as a start time.
- Click on the trimming area to preview the video, find the end, then click the button to set as an end time.
- Your selected time will be yellowed, you can preview it by pressing the button.
- If the result doesn't fit what you wanted, repeat steps 2 - 4.
- If the result is what you wanted, click the button, enter the clip name, then click .
- Your video will appear in the Latest Clips section with a Processing status. Please wait while the video is being processed. You can trim another video while waiting.
- When the Processing status disappears, click the button to download the video.
TIP
You can hold the left click and drag to the right instead of the step 2-3.
# Take a Screenshot
You can take a screenshot at the current position as a single image file by clicking the button.